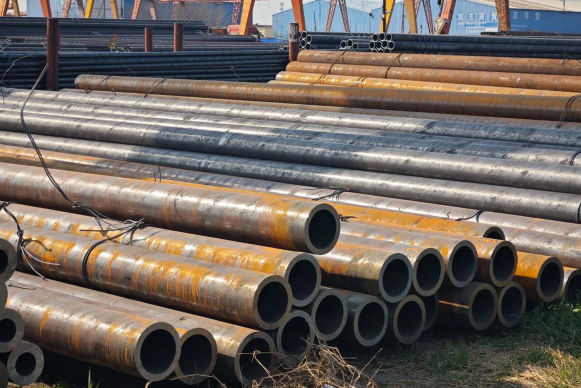
How to Identify the Quality of Carbon Steel Seamless Pipes?
Carbon steel (CS) seamless pipes are core components of pressure-bearing systems and critical structures; their quality is fundamental to safety. A rigorous inspection procedure is crucial for managing project risks and avoiding hidden costs. This guide provides a clear and actionable quality verification path based on the logic of "document review first, then physical verification; overall performance first, then details."

Step 1: Document and Document Review
Document and document review is the most efficient way to distinguish between genuine and inferior products.
1. Verify the supplier's qualifications: Is it a well-known steel mill or a large authorized agent? Can they provide a factory production license?
2. Request and verify the Factory Quality Certificate (MTC): Reputable carbon steel seamless pipe manufacturers must provide a material testing certificate for each batch of products.
Then, verify the following information:
a. Standards and Grades: Whether they match the procurement requirements (e.g.,
ASTM A106 GR.B);
b. Chemical Composition: Whether C, Si, Mn, S, P, etc., meet the standard range;
c. Mechanical Properties: Whether the measured values of tensile strength (Rm), yield strength (ReL/Rp0.2), and elongation after fracture (A) meet the standards;
d. Process Performance Testing: Hydrostatic test pressure and results;
e. Non-destructive Testing: Testing standards and acceptance levels for ultrasonic testing (UT) or eddy current testing (ET);
f.
Hydrostatic Test: Test pressure value and holding pressure result;
g. Traceability Information: Whether the furnace batch number, production date, and inspection stamp are complete and clear, etc.
Step Two: Basic Physical Inspection of the Product
When we receive the goods, we need to perform some basic inspections on the carbon steel seamless pipes.
1. Appearance and Markings
Surface Quality: It should be the normal color after rolling or heat treatment (silver-gray or with black oxide scale). Minor scratches, dents, and oxide scale are permissible, provided they do not exceed the negative tolerance of the wall thickness. However, defects such as cracks, scars, folds, and delamination are strictly prohibited. The pipe end face should be cut smoothly and without burrs to facilitate observation of wall thickness uniformity.
Clear Marking: CS seamless steel pipes should have inkjet printing or steel stamping indicating the grade, specifications, standard, furnace batch number, and manufacturer's mark, corresponding to the quality certificate.
2. Dimensional and Wall Thickness Spot Check
Using outside calipers and an ultrasonic thickness gauge, measure the outside diameter and wall thickness at multiple points on the pipe end to check for compliance with standard tolerances. Pay particular attention to wall thickness uniformity and the absence of severe "eccentricity."
Step 3: Targeted Performance Verification
When there is doubt about the quality of the CS seamless steel pipe or it has an important application, additional targeted performance testing is required (e.g., third-party testing). For orders with critical applications, the sampling ratio and items for performance verification can be specified in the contract and performed by a third party.
1. Mechanical Property Retest
Method: Take samples from the pipe body and send them to a qualified third-party laboratory for tensile testing according to standards to verify the data.
Purpose: To verify whether the tensile strength, yield strength, and elongation are consistent with the quality certificate.
2.
Non-destructive Testing Retest
Ultrasonic testing: Inspect for internal cracks, inclusions, porosity, and delamination.
Magnetic particle testing: Inspect for surface and near-surface micro-cracks.
3. Chemical Composition Retest
Perform rapid on-site analysis using a spectrometer or send samples to a laboratory for precise analysis.
4. Hardness Test (Auxiliary)
Used to assess the workability of the material or the uniformity of the heat treatment state; generally not used as a strength criterion.
5. Metallographic Analysis
Observe the microstructure (e.g., whether ferrite + pearlite is normal) to determine for process defects such as overheating and decarburization.
Fourth Step: Process Performance Inspection
Necessary inspections are required based on the actual usage environment or operating conditions of the carbon steel seamless pipe.
1. Pressure Test: For
pipeline transportation projects, a system pressure test is usually conducted according to design specifications before installation. However, this is to verify the overall sealing performance of the pipeline system (including connectors), not a factory-substitute inspection for individual pipes.
2. Weldability Check: Inspect the quality of the pipe end beveling; weld procedure qualification should be performed if necessary.
Procurement Considerations:
a. Beware of low-price traps: Steel pipe products priced far below market value are highly likely to have substandard chemical composition, non-destructive testing, and mechanical properties, or even falsified quality documents.
b. Don't rely on "old methods": Judging by color, listening to sound, or simple weighing are largely ineffective for modern industrial product quality assessment.
c. Verify core aspects: Focus your efforts on selecting reputable suppliers and rigorously verifying quality certificates and physical markings.
d. Clearly define contract technical requirements: Clearly specify the standard number, grade, dimensional tolerances, flaw detection level, and required quality documents in the procurement contract. This is the legal basis in case of disputes.
Read more: Seamless Steel Pipe Sizes and Weights or How to Customize Your Seamless Carbon Steel Pipe


