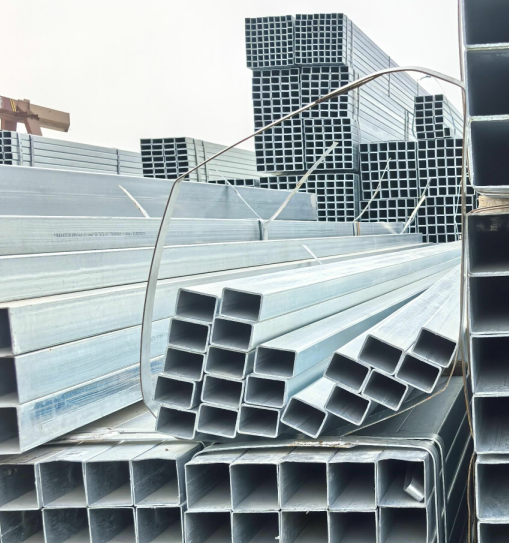
Galvanized square and rectangular tubes are widely used in construction, machinery manufacturing, and many other fields. Their quality directly affects the safety and stability of projects. Quality inspection of galvanized square and rectangular tubes is a systematic process, requiring comprehensive testing from multiple aspects such as appearance quality, dimensional accuracy, chemical composition, mechanical properties, and corrosion resistance. Only by strictly adhering to relevant standards can the quality of galvanized square and rectangular tubes be ensured to meet requirements, providing a guarantee for the safety and stability of projects.
The specific quality inspection methods for galvanized square and rectangular tubes are as follows:
Appearance Quality Inspection:
1. Surface Defects
The surface of the galvanized square and rectangular tube should be smooth and flat, free from obvious defects such as cracks, sand holes, scales, and folds. Cracks will severely reduce the strength of the tube, making it prone to breakage under stress; sand holes may cause internal corrosion, shortening its service life; scales and folds will affect the appearance of the tube and may also affect its performance. During inspection, visual inspection can be used to carefully observe various parts of the tube surface.

2. Galvanized Coating Quality
The galvanized coating should be uniform and continuous, free from defects such as missed areas, nodules, and peeling. Missed areas will leave parts of the pipe unprotected, making them prone to rust and corrosion; nodules will affect the dimensional accuracy and appearance of the pipe; peeling will cause the galvanized coating to separate from the pipe substrate, reducing its protective effect. A preliminary assessment can be made by visual inspection combined with touch. For uncertain cases, professional coating thickness gauges can be used for testing.
3. Color Consistency
The color of galvanized square and rectangular pipes should be basically consistent, with no significant color difference. Excessive color difference may indicate problems with the
galvanizing process, or that the pipe has been contaminated or oxidized to varying degrees during production.
Dimensional Accuracy Inspection:
1. Pipe Diameter and Wall Thickness
Pipe diameter and wall thickness are important dimensional parameters of galvanized square and rectangular pipes and must meet relevant standards. Excessive deviation in pipe diameter will affect the connection and fit between the pipe and other components; uneven wall thickness will lead to uneven strength distribution, making the pipe prone to localized deformation or damage under stress. During inspection, calipers, micrometers, and other measuring tools can be used for measurement. Measurements should be taken at different locations on the pipe to ensure accuracy.
Dimensions after galvanizing: Note that galvanizing increases thickness, affecting mating dimensions; the contract must clearly specify whether the dimensions to be inspected are "before galvanizing" or "after galvanizing."
2. Length and Curvature
The length of the pipe should meet the contract requirements, and its deviation should be within the specified range. Curvature is also an important inspection indicator; excessive curvature will affect the installation and use of the pipe. Generally, the bending degree of the pipe is checked using a string method or a straightedge method. The string or straightedge is placed against the surface of the pipe, and the maximum gap between the pipe and the string or straightedge is measured to determine whether the curvature meets the standard. In addition, laser leveling instruments or the platform + feeler gauge method are also commonly used for more accurate measurements.
Chemical Composition Inspection:
The chemical composition of galvanized square and rectangular pipes directly affects their mechanical properties and corrosion resistance. It is usually necessary to analyze the content of elements such as carbon, silicon, manganese, sulfur, and phosphorus in the pipe. Excessive carbon content increases the hardness of the pipe but reduces its toughness; excessive content of impurities such as sulfur and phosphorus reduces the pipe's corrosion resistance and weldability. Chemical composition testing generally uses methods such as spectral analysis to determine whether the content of each element meets the standard requirements by testing pipe samples.
Mechanical Property Testing:
1. Tensile Test
The tensile test is one of the important methods for determining the mechanical properties of galvanized square and rectangular tubes. Through the tensile test, indicators such as yield strength, tensile strength, and elongation of the pipe can be obtained. Yield strength reflects the stress at which the pipe begins to undergo plastic deformation; tensile strength represents the maximum tensile stress the pipe can withstand; elongation reflects the pipe's plastic deformation capacity. When conducting a tensile test, the specimen should be prepared according to the requirements of relevant standards and tested using equipment such as a universal testing machine.
2. Bending Test
The bending test is mainly used to test the bending performance and welding quality of the pipe. The pipe is bent at a specified bending radius and angle, and the surface of the pipe is observed for defects such as cracks and delamination. If the above defects appear during bending, it indicates a potential quality problem with the pipe.
3. Impact Test
The impact test is used to evaluate the toughness of the pipe under impact loads. By applying an impact load to the pipe sample, the energy absorbed by the sample during the impact is measured to determine the toughness of the pipe. Impact tests are generally conducted using equipment such as a pendulum impact testing machine.
Corrosion Resistance Testing:
1. Salt Spray Test
The salt spray test is a commonly used corrosion resistance test method that simulates a marine environment. Galvanized square and rectangular pipe samples are placed in a salt spray test chamber and sprayed under specified test conditions. After a certain period, the corrosion on the pipe surface is observed. The corrosion resistance of the pipe is evaluated based on the degree of corrosion.
2. Immersion Test
The immersion test involves immersing the pipe sample in a specific corrosive medium. After a certain period, indicators such as the change in pipe mass and corrosion rate are measured to evaluate the corrosion resistance of the pipe. This method is more suitable for research and development or assessment of specific media environments and is rarely used in routine trade acceptance.
Read more: Square Tube Sizes or Guidelines for Selecting Galvanized Coating Thickness of Steel Pipes


