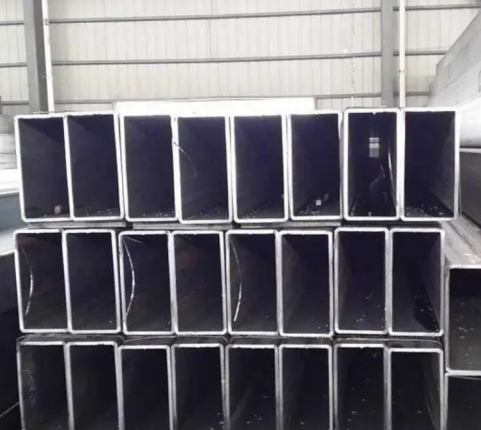
It exists on the outer or inner surface of the ASTM A500 rectangular tube in a linear or spiral, continuous or discontinuous state. The main reason for folding is the quality of the pipe. The folding itself or the surface is poor, there are inclusions, there are serious scratches and cracks, there are edges and corners in the polished area, and it folds after stretching. In order to avoid folding, the quality of the pipe should be improved and attention should be paid to inspection and polishing.
2. Rectangular tube pit
This is one of the surface defects of ASTM A500 rectangular pipes. It is distributed in local depressions in different areas of the steel pipe surface. Some are periodic and some are irregular. Dents are caused by scale or other factors. During the drawing or straightening process, hard dirt is pressed into the surface of the steel pipe, or the existing skin on the surface of the steel pipe is peeled off. When there are smooth or sharp spiral marks on the outer surface, the straightener should be inspected. Due to incorrect position and angle of the straightening roller, friction occurs between the steel pipe and the edge of the straightening roller during straightening, and wear grooves appear on the shoulder and the straightening roller. When the ends of steel pipes are bent too much, pits may appear on the outer surface of the steel pipe.

4. Pockmarked noodles
It is characterized by small pits on the surface of the steel pipe. The main cause of the pitted surface is the pitting produced during the pickling process. After annealing, the iron sheet is overthick and straightened, and then pressed into the surface of the steel pipe to form pitted surface steel pipes. The storage environment is humid, and pitting may even occur after water enters, and pits will form after rust spots are removed.
Detection method for surface defect detection of ASTM A500 rectangular tubes:
1. Ultrasonic testing
During the propagation of the sound beam with high-frequency sound energy in the tube, it is reflected when it hits the inner surface or defects, thereby discovering defects. The amount of reflected sound energy is a function of the directionality and nature of the interior surface or defect and the acoustic impedance of such reflectors. Therefore, the sound energy reflected from various defects or internal surfaces can be used to detect the location of the defect, the wall thickness, or the depth of the defect below the surface. Ultrasonic testing is a widely used non-destructive testing method. Its main advantages are high detection sensitivity and the ability to detect tiny cracks; large penetration ability and the ability to detect thicker sections.
2. Eddy current flaw detection
Eddy current testing is suitable for inspecting defects below the surface of ASTM A500 rectangular tubes, and the depth generally does not exceed 6-7mm. There are two types of eddy current testing: the coil placement method and the through-coil method. If there are defects on the surface of the casting, the electrical characteristics of the eddy currents will be distorted, allowing the presence of defects to be detected. The main disadvantage of eddy current testing is that it cannot directly display the size and shape of the defects being detected. Generally only the surface location and depth of the defect can be determined.
3. Ray detection
Generally, X-rays or gamma rays are used as the radiation source, so radiation-generating equipment and other auxiliary facilities are required. When the ASTM A500 rectangular tube is placed in a radiation field, the radiation intensity of the radiation is affected by defects within the casting. The intensity of radiation emitted through the casting varies locally depending on the size and nature of the defect, forming a radiographic image of the defect, which can be visualized and recorded with radiographic film, or detected and observed in real time with a fluorescent screen, or detected with a radiation counter. In addition, the use of microfocus X-ray systems with approximate point sources also virtually eliminates the blurred edges produced by larger focus devices, resulting in sharper image contours. The use of digital imaging systems can improve the signal-to-noise ratio of images and further improve image clarity.
4. Magnetic particle testing
It is suitable for detecting surface defects and defects several millimeters deep below the surface. DC magnetizing equipment and magnetic powder are required for testing operations. Magnetizing equipment is used to generate a magnetic field on the inner and outer surfaces of the casting, and magnetic powder or magnetic suspension is used to reveal defects. When the square tube generates a magnetic field within a certain range, defects in the magnetized area will generate a leakage magnetic field. When magnetic powder or suspension is sprinkled, the magnetic powder is attracted and can reveal defects.
5. Liquid penetration
Liquid penetrant testing is used to inspect various opening defects on the surface of ASTM A500 rectangular tubes. A commonly used penetration test is a coloring test, which involves soaking or spraying a colored liquid with high penetrating ability on the surface of the casting. The penetrant penetrates into open defects, the surface penetrant layer is quickly wiped off, and an easy-drying revealing agent is sprayed onto the casting surface. After the remaining penetrant in the open defect is sucked out, the imaging agent is stained to reflect the shape, size and distribution of the defect. In addition to color testing, fluorescence penetrant testing is also a commonly used method for liquid penetrant testing. An ultraviolet lamp is required for irradiation and observation, and its detection sensitivity is higher than that of color detection.
Go here to learn more: Manufacturing process and application fields of square tubes
Related information
